Badge #100 came from Advanced VMware Cloud Foundation 9.0 Networking, earned by passing the VMware Certified Advanced Professional (VCAP) VCF Networking (3V0-25.25) exam, released right around January 10, 2026.
The timing couldn’t have been better. Earlier in January, I attended an internal Private AI Services and Architecture training in Palo Alto, where I earned an exam voucher. That turned out to be the perfect nudge to take the exam while everything, from VCF 9.0 networking architecture to NSX design patterns, was still fresh in my mind.
It’s a good reminder that learning never really stops in this space. Every badge represents hours spent digging into the details, validating what you think you know, and leveling up your ability to help customers navigate complex environments.
What made this milestone particularly interesting was the new-content, new-blueprint factor. The exam goes far beyond memorization, it tests hands-on skills across design, deployment, configuration, operations, and troubleshooting of VCF Networking environments. It emphasizes NSX architecture, Tier-0 and Tier-1 gateways, VPCs, federation, services, and real-world troubleshooting scenarios.
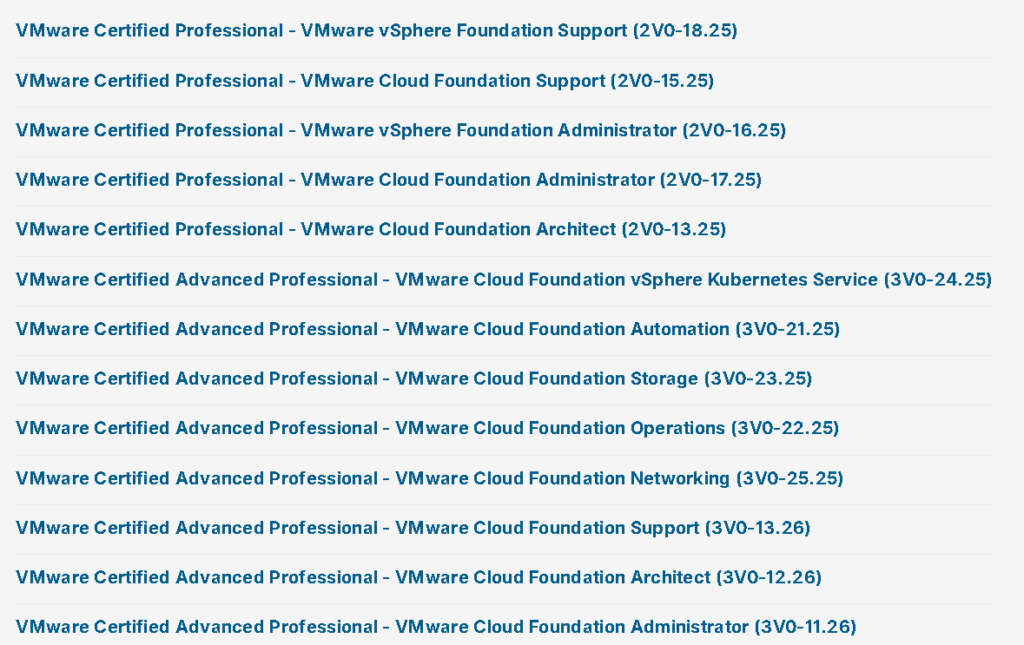
VMware has expanded its VMware Cloud Foundation (VCF) certification portfolio with a comprehensive set of new VCAP (VMware Certified Advanced Professional) exams, reinforcing its commitment to modern private cloud skills. These certifications are designed for IT professionals who want to go beyond basic administration and demonstrate advanced, real-world expertise in designing, operating, and supporting VCF environments.
The new VCF-aligned exams span both VCP and VCAP levels, covering critical roles across the cloud lifecycle, from support and administration to architecture and advanced operations. At the VCAP level, candidates can now validate deep technical skills in specialized domains such as Automation, Networking, Storage, Operations, Kubernetes, and Architecture, all advanced subject matter domains within the context of VMware Cloud Foundation.
This updated lineup reflects how enterprises actually deploy private cloud today: integrated, automated, and Kubernetes-ready. By offering role-based and domain-focused VCAP exams, VMware enables professionals to align certifications with their day-to-day responsibilities and career goals, whether they’re cloud administrators, platform engineers, SREs, cloud architects, or enterprise architects.
Overall, the new VCF VCAP exams represent a new evolution of VMware’s certification program. They provide a clear, structured path for validating advanced private cloud expertise and help organizations ensure their teams are ready to design and operate scalable, secure, and modern VCF-based environments.
You can follow this link to learn more and schedule your exam(s).
The vExpert program has had a real and lasting impact on my career, not because of the badge, but because of what it represents: contribution, community, and shared learning.
Early on, vExpert pushed me to be more intentional about giving back. Writing about real-world experiences, sharing lessons learned, and helping others troubleshoot VMware-related challenges forced me to deepen my own understanding. Teaching, I quickly learned, is one of the fastest ways to grow.
What surprised me most was how powerful the community aspect became. Through blogs, social platforms, and direct conversations, I’ve connected with people across the VMware ecosystem-engineers, architects, partners, and product teams. Those relationships didn’t come from networking for the sake of networking; they came from solving problems together.
A big part of my involvement has been helping others navigate technology and certifications, answering architecture questions, breaking down complex concepts, and offering guidance based on real-world experience. That exchange has been incredibly rewarding, and it’s reinforced how strong this community really is.
From a career perspective, vExpert gave me visibility, credibility, and momentum, but more importantly, it gave me a platform to contribute in a meaningful way. Sharing knowledge consistently has opened doors, sparked conversations, and kept me learning alongside some of the smartest people in the industry.
If you’re considering applying, my advice is simple: focus on helping others. The rest follows naturally.
The vExpert program continues to remind me that the best careers are built through community. If you’re passionate about learning, sharing, and giving back, it’s absolutely worth your time.
The power to secure workloads at their very core is what excites me most. With technologies like the vDefend Firewall, we can stop threat actors in their tracks, long before they ever touch an operating system. This isn’t security bolted on after the fact; it’s protection woven directly into the I/O chain at the vNIC level, where it’s most effective. And my passion for this goes far beyond my role at Broadcom, it comes from years of working in network and security architecture and knowing firsthand how critical it is to prevent threats before they have a chance to spread.
What makes this different is where the enforcement happens. We stop unwanted traffic right at the vNIC level in the I/O chain deep in the kernel, before it ever has a chance to propagate. There’s no need to hairpin traffic, no complex re-architecture of the network, and no forced dependencies on fragile designs. We’re already in the hypervisor, already in the kernel; we just need to enable the functionality, on board your Distributed Virtual Port Groups (DVPGs), and apply policy.
Pro Tip: DFW operates closest to the workload, blocking malicious traffic before it touches the OS.
Contrast this with “micro-segmentation” approaches elsewhere:
In the public cloud, security often means slicing networks into increasingly smaller subnets just to make use of Security Groups. It’s a process that’s time-consuming, complex, and unforgiving, demanding absolute precision. The trade-off? You lose advanced controls and visibility, leaving you dependent on protections inside the operating system rather than stopping threats before they get there.
In traditional environments, segmentation often requires hairpinning traffic through multiple physical firewalls. These appliances are not optimized for East-West traffic, making the approach costly, inefficient, and difficult to scale.
Both approaches add operational complexity. With vDefend, we can achieve segmentation in a more direct, efficient, and inherently secure way.
This is why I say from a security perspective, we’re built different.
And to make this journey even smoother, I will be using Nikodim Nikodimov’s GitHub repo as my 🛠️ Terraform baseline for automating port association, group creation, and tagging of my Distributed Firewall (DFW) policies for my Management Domain: 👉 vcf-mgmt-wld-security on GitHub
For anyone diving into VMware Cloud Foundation and vDefend Firewall looking to truly segment their Management Domain, this is an incredible starting point.
A few requirements before you get going:
A VCF Environment and NSX Managers
In VCF 9.0 your NSX will grab a valid VCF license from the vCenter that it’s connected to, this happens automatically
A valid vDefend Firewall License (The VCF license must be present prior to adding the vDefend Firewall license)
Activate NSX on DVPGs, this can be done from the NSX Manager → System Tab → Fabric Drop Down → Hosts Sub Tab in the ⚙️ Actions menu. (Screenshot below)
In my environment, I’ve already Activated NSX on my DVPGs, and the process completed fairly quickly.
The number one question I am asked, is there any impact on existing traffic?
No Outage on Existing Traffic → The action does not bounce VMs or drop traffic. VMs attached to those DVPGs keep running normally.
Policy Enforcement Becomes Active → Once activated, NSX policies (DFW rules, groups, tags, etc.) can be applied to workloads on those port groups. That’s the main effect.
No Network Rewiring → This doesn’t rewire your uplinks or force a switch migration. Traffic forwarding continues as before.
After downloading the repo, your primary focus should be the terraform.tfvars file, this is where you’ll define the details of your environment. Files with the m01 prefix correspond to your Management Domain, while those with the w01 prefix are for your Workload Domain. In my Home Lab, I don’t have a Workload Domain deployed, so I simply commented out several of the w01 entries to make everything work smoothly.
Here’s how I edited my terraform.tfvars file:
dns_server          = "10.20.254.254"
ntp_server          = "10.20.254.254"
dhcp_server         = "10.20.254.254"
ad_server           = "10.20.254.250"
smtp_server         = "10.20.254.251"
bastion_host        = "192.168.1.169"
#make sure you put a valid host here, this was my main workstation. If you fail to list a valid value here you won't be able to access your Management Components.
tools_server        = "10.20.254.100"
backup_server       = "10.20.254.100"
#sftp server
siem_server         = "10.20.250.221"

#mgmt-domain
nsx_manager         = "nsx.varchitected.com"
nsx_username        = "admin"
nsx_password        = "VMware123!VMware123!"
sddc_manager        = "sddc-manager"
#this is a virtual machine name
m01_vcenter         = "vcenter"
#this is a virtual machine name
m01_nsx_manager_a   = "nsx-a"
#this is a virtual machine name
m01_nsx_manager_b   = "nsx-b"
#this is a virtual machine name
m01_nsx_manager_c   = "nsx-c"
#this is a virtual machine name
m01_edges           = "10.90.250.91-10.90.250.92"
m01_hosts           = "10.20.250.101-10.20.250.104"
#this is looking for an IP Address or Range
m01_sspm            = "10.20.255.100-10.20.255.130"
#this is looking for an IP Range
vm_management_dvpg  = "vcf-vds01.[DVPG 250] SDDC MANAGEMENT"
aria_x_ans          = "vcf-vds01.[DVPG 250-1] ARIA SUITE"
#DVPG
aria_ans            = "vcf-vds01.[DVPG 250-1] ARIA SUITE"
#Same as above
m01_ssp_dvpg        = "vcf-vds01.[DVPG 255] VDEFEND SSP"
#I have a dedicated DVPG for SSP
m01_sspi_vm         = "ssp-deploy"

#wld-domain
w01_vcenter         = ""
w01_nsx_manager_a   = ""
w01_nsx_manager_b   = ""
w01_nsx_manager_c   = ""
w01_edges           = ""
w01_hosts           = ""
w01_sspm            = ""
w01_ssp_dvpg        = ""
w01_sspi_vm         = ""
#I don't have a Workload Domain in my lab
Don’t be me. I accidentally assigned my entire SDDC-MGMT DVPG (vcf-vds01.[DVPG 250] SDDC MANAGEMENT) as a member of the Aria Suite group. While this Terraform works fine if you have configured a dedicated DVPG for your Aria Suite components, it’s something to be careful with. You may need to change the Terraform to validate against a Tag. Terraform will validate any DVPG listed in the tfvars file, so a misconfiguration here could unnecessarily block traffic.
Looks like my “Deny Any/Any” rule has been busy clocking miles, those counters are sky high. Of course, dropping it at the end of the Aria Suite Policy means it’s happily catching… well, all of my traffic before it gets to the Application level.
I updated the group membership to use a tag-based approach for the VMs tied to the Aria Management components. I made the change through the GUI, though it could just as easily have been done in Terraform. Nikodim’s Terraform configuration provides a solid head start by eliminating much of the manual policy creation, it’s then up to you to tailor and complete it for your specific environment.
The policy is now behaving as intended, with traffic reaching the Application category without being denied first.
Another critical rule is outbound internet access. While your Network team may enforce this at the perimeter firewall, you should also enforce it yourself. In this case, we’re using Context Profiles to allow outbound HTTPS traffic only to the Broadcom Depot FQDNs for updates, nothing more.
This INTERNET_FQDNs Context Profile is configured to target wildcard domains for the destination of your rules, you can be more specific with the domains used if you want (see below):
Remember, NSX evaluates policies left to right, top to bottom → policy and rule order matters:
Ethernet → Layer 2 rules.
Emergency→ High-priority, critical rules.
Infrastructure→ Rules for core network services and infrastructure components.
Environment → Rules for specific environments like production or development.
Application → Application-specific rules.
Here are a few best practices and preparation tips to keep in mind before moving into Production.
Flip any Default Drop rules to allow initially in Terraform until you have it working the way you want, once you validate traffic flow you can flip these rules to drop. A list of the Default Drops are below:
M01_WLD Default Drop → M01_WLD Policy
W01_WLD Default Drop → W01_WLD Policy
Aria Suite Default Drop → VCF01 Aria Suite Policy
Lock down management access to your trusted Bastion Hosts, and always plan for disaster. Because it’s not if it happens, it’s when.
Tighten your outbound internet policy so only your vCenter and SDDC Manager have the outbound access they truly need. Threat groups like Scattered Spider have abused outdated vCenter appliances to maintain persistence in environments. With proper segmentation in place, it becomes highly unlikely that these clowns could scale the walls you’ve built. Restrict only to HTTPS and use Context Profiles only for the specific Domain Names that the Appliances need.
Always use Applied To wisely, let your policies land only where they’re needed. No sense in weighing down every VM’s firewall when a few will do.
Test, validate, verify, and confirm that your rules are working the way you want. Leverage CURL, Netcat, Telnet, and Ping to validate the connectivity between your appliances.
Use the Security Services Platform (SSP) included with vDefend Firewall to uncover unprotected flows in your environment, and secure them.
Don’t forget to consider 3rd party solutions like Backup Vendors that heavily interact with your vCenter and Hosts. Also ensure that your SFTP Backups for your VCF Appliances are working as expected.
Use the VMware Ports and Protocols site as a reference point of the ports used for communication in VCF: https://ports.broadcom.com/
And as always… keep your layers tight and your traffic light, stay segmented, my friends.
Ultimately, the takeaway is simple: with the right policies and segmentation, you can secure your Management Domain, VI Workload Domains, Virtual Machines, Containers, and AI workloads, all from a single platform. Bringing enterprise-grade protection to your modern private cloud. I hope this walkthrough showed you not just the “how,” but also gave you the confidence to take the next steps in hardening your environment.
VMware Explore 2025 starts today, and whether you’re joining in Las Vegas or tuning in virtually, this guide will help you make the most of every session, networking opportunity, and announcement.
📋 Before You Go: Planning & Resources
Official Explore Blogs → Get started by checking out the official blogs below:
Hashtags → Use and follow #VMwareExplore to join the global conversation.
🕹 Onsite Experience
Certification Exam Center → Don’t miss the opportunity to schedule a certification exam onsite. Your full event pass includes a complimentary exam voucher, a fantastic way to validate your expertise while you’re at Explore.
Hands-on Labs → A signature of VMware Explore, HOLs give you direct access to VMware technology in guided lab environments.
The Party & Giveaways → Don’t skip the legendary Explore party or booth giveaways, both are designed to connect, celebrate, and bring the community together.
Badge Pickup and Registration → Head to Level 2, Venetian Ballroom D, to pick up your badge. For faster check-in, have your Print Badge QR Code ready from the mobile app along with a valid photo ID.
Coat and Bag Drop → Found at the registration area on Level 2, below are the hours:
Sunday, August 24 → 8:00 AM – 7:00 PM PDT
Monday, August 25 → 7:30 AM – 7:00 PM PDT
Tuesday, August 26 → 7:30 AM – 5:30 PM PDT
Wednesday, August 27 → 7:00 AM – 6:00 PM PDT
Thursday, August 28 → 7:30 AM – 11:00 AM PDT
🎥 Sessions & Recordings
General Session → Attend live on Tuesday, August 26, from 9:00 – 10:00 AM PDT. If you can’t join, a replay will be available on-demand.
Breakout Sessions → Explore the session catalog to plan your days strategically.
Post Event Access → All session recordings available starting October 1, 2025 in the VMware Explore Video Library.
VMware Explore 2025 promises to be one of the biggest moments of the year for IT professionals, architects, and customers exploring what’s next in private cloud, networking, AI, and security. Whether you’re walking the halls of The Venetian or tuning in from your home office, this guide should help you maximize every moment.
The Minisforum MS-A2 ships with the Intel X710 10G SFP network card (retail version), but getting the most out of it requires a proper firmware update. In this guide, I’ll walk you through the steps to update to firmware version 9.54 on ESXi 9.0. While there’s a few ways you can install the Firmware I wanted to purely do it from ESXi. Here’s what to expect:
Latest Intel Firmware for 700 Series NICs
Install the Intel nvmupdaten64e VIB
PuTTy / WinSCP
Do it all on ESXi 9.0
Have time for 2 reboots
Running the following command gives you information about your NIC, we’re looking for the VID/DID/SVID/SSID values so we can verify grabbing the correct Firmware:
esxcli hardware pci list
Before you dive into a firmware update, make sure you check the Broadcom Compatibility Guide. It’s an easy step to skip, but downloading the wrong firmware can quickly turn into a very expensive mistake, sometimes even bricking your card. I always use it for cross referencing in these scenarios.
Intel tends to safeguard against that by building in protections by changing the SSID uniquely for OEMs, but things can still go sideways if you get creative in ways you shouldn’t. For example, some folks try to tweak configuration files to force a device mapping that isn’t supported, swapping an OEM firmware for a retail firmware when it should absolutely stay OEM. That’s a recipe for trouble. (Boom Bricked NIC)
The takeaway? Stick with the compatibility guide, follow the proper firmware path for your hardware, and save yourself from a potential headache (and a dead card).
The results show Intel Corporation in the Brand Name which indicates that this is an Intel Retail NIC. If it showed any other name it would belong to that respective OEM.
You can now head over to the Intel Website to grab the Firmware Package (search by VMware or ID # 18638) and grab the Non-Volatile Memory (NVM) Update Utility for Intel Ethernet Adapters 700 Series – VMware ESX (ID # 18638):
You can change the version that you want in the drop down, I went with 9.54.
The tar ball contains a VIB that allows you to run nvmupdaten64e from inside of an ESXi host. Upload it to a repository (with WinSCP/SCP/Datastore Upload) on your host and run the following command to extract the tar:
tar -xzvf 700Series_NVMUpdatePackage_v9_54_ESX.tar.gz
You’ll find the following file among the archive – Intel-esx-nvmupdaten64e_1.43.8.0-800.20613240_24669197.zip. Run the following command to install the vib.
This is a VMwareAccepted VIB, which indicates that it is tested and verified by us to work as expected. More on Acceptance Levels for VIBs here.
Put your host in maintenance mode and reboot the host, once you’re back up and running with the VIB installed you’ll need to find where nvmupdaten64e is located.
nvmupdaten64e will be located here:
/opt/nvmupdaten64e/bin/
You won’t be able to add any files to this directory so you have to use the command line option (-a) to provide a working directory that has your Firmware Binaries and Config Files. You can issue the following command to get it going:
./nvmupdaten64e -a /the/directory/where/you/extracted/your/tar/ESXi_x64
You’ll be able to indicate here if you want to update (A) All Firmware or select a number, in my case the Intel X710 was (01). So I went with(01) and installed the Firmware successfully. Once it completes you’ll have to reboot again. Roll the dice on whether you want to backup your NVM images or not.
You’ll notice that my Intel Ethernet XXV710-DA2 25G NIC shows “Update not available” which means that it’s not supported by this Intel Retail Firmware. I found out that it’s actually a Dell OEM version of the Intel Ethernet XXV710 25G by using the BCG to cross reference its DID/VID/SVID/SSID, I’ll write up how I got through that Firmware update soon without an iDRAC or Lifecycle Manager.
Edit: This process can be used for any retail Intel 700 Series NIC inside of an ESXi 8.0 or 9.0 host, here’s a list of adapters that are compatible:
You have and are seeing Host Seeding Failed errors in your vcsa-cli-installer.log on your VCF Installer.
You’re deploying in a Home Lab or Test Environment.
Ran into this little error while running through my VCF install:
2025-08-17 22:34:49,819 - vCSACliInstallLogger - ERROR - Traceback (most recent call last):
  File "main.py", line 412, in <module>
  File "main.py", line 386, in main
  File "/build/mts/release/bora-24623374/src/bora/install/vcsa-installer/vcsaCliInstaller/tasking/workflow.py", line 777, in execute
  File "/build/mts/release/bora-24623374/src/bora/install/vcsa-installer/vcsaCliInstaller/tasking/workflow.py", line 765, in execute
  File "/build/mts/release/bora-24623374/src/bora/install/vcsa-installer/vcsaCliInstaller/tasking/taskflow.py", line 1007, in execute
  File "/build/mts/release/bora-24623374/src/bora/install/vcsa-installer/vcsaCliInstaller/tasking/taskflow.py", line 971, in _execute_single_threaded
tasking.taskflow.TaskExecutionFailureException: Host seeding failed:(vmodl.MethodFault) {
   dynamicType = <unset>,
   dynamicProperty = (vmodl.DynamicProperty) [],
   msg = 'MethodFault.summary',
   faultCause = <unset>,
   faultMessage = (vmodl.LocalizableMessage) [
      (vmodl.LocalizableMessage) {
         dynamicType = <unset>,
         dynamicProperty = (vmodl.DynamicProperty) [],
         key = 'com.vmware.vcint.error_from_vlcm',
         arg = (vmodl.KeyAnyValue) [
            (vmodl.KeyAnyValue) {
               dynamicType = <unset>,
               dynamicProperty = (vmodl.DynamicProperty) [],
               key = 'vlcm_error',
               value = 'Error:\n   com.vmware.vapi.std.errors.error\nMessages:\n   com.vmware.vcIntegrity.lifecycle.EsxImage.SoftwareInfoExtractError<An error occurred while extracting image info on the host.>\n   com.vmware.vcIntegrity.lifecycle.ExtractDepotTask.HostExtractDepotFailed<Extraction of image from host hlab01.varchitected.com failed.>\n'
            }
         ],
         message = "An internal error occurred: 'Error:\n   com.vmware.vapi.std.errors.error\nMessages:\n   com.vmware.vcIntegrity.lifecycle.EsxImage.SoftwareInfoExtractError<An error occurred while extracting image info on the host.>\n   com.vmware.vcIntegrity.lifecycle.ExtractDepotTask.HostExtractDepotFailed<Extraction of image from host hlab01.varchitected.com failed.>\n'"
      }
   ]
}

2025-08-17 22:34:49,819 - vCSACliInstallLogger - ERROR - Exception message: Host seeding failed:(vmodl.MethodFault) {
   dynamicType = <unset>,
   dynamicProperty = (vmodl.DynamicProperty) [],
   msg = 'MethodFault.summary',
   faultCause = <unset>,
   faultMessage = (vmodl.LocalizableMessage) [
      (vmodl.LocalizableMessage) {
         dynamicType = <unset>,
         dynamicProperty = (vmodl.DynamicProperty) [],
         key = 'com.vmware.vcint.error_from_vlcm',
         arg = (vmodl.KeyAnyValue) [
            (vmodl.KeyAnyValue) {
               dynamicType = <unset>,
               dynamicProperty = (vmodl.DynamicProperty) [],
               key = 'vlcm_error',
               value = 'Error:\n   com.vmware.vapi.std.errors.error\nMessages:\n   com.vmware.vcIntegrity.lifecycle.EsxImage.SoftwareInfoExtractError<An error occurred while extracting image info on the host.>\n   com.vmware.vcIntegrity.lifecycle.ExtractDepotTask.HostExtractDepotFailed<Extraction of image from host hlab01.varchitected.com failed.>\n'
            }
         ],
         message = "An internal error occurred: 'Error:\n   com.vmware.vapi.std.errors.error\nMessages:\n   com.vmware.vcIntegrity.lifecycle.EsxImage.SoftwareInfoExtractError<An error occurred while extracting image info on the host.>\n   com.vmware.vcIntegrity.lifecycle.ExtractDepotTask.HostExtractDepotFailed<Extraction of image from host hlab01.varchitected.com failed.>\n'"
      }
   ]
Part of the fix was relatively easy and had to do with removing the VIB that I used to bypass the vSAN HCL from William Lam’s GitHub:
It appears you need this for the validation, I plan to import this into VLCM to redistribute to the rest of the cluster later.
The lifecycle.log also showed this was missing, apparently you also need to stage the VM Tools VIB on the host prior to adding it to VCF.
2025-08-17T23:41:02Z In(14) lifecycle[2101592]: imagemanagerctl:1174 Calling with arguments: software --getsoftwareinfo
2025-08-17T23:41:03Z In(14) lifecycle[2101592]: HostImage:269 Installers initiated are {'quickpatch': <esximage.Installer.QuickPatchInstaller.QuickPatchInstaller object at 0x812942b990>, 'live': <esximage.Installer.LiveImageInstaller.LiveImageInstaller object at 0x812fa281d0>, 'boot': <esximage.Installer.BootBankInstaller.BootBankInstaller object at 0x812f7f16d0>, 'locker': <esximage.Installer.LockerInstaller.LockerInstaller object at 0x812fc43290>}
2025-08-17T23:41:03Z Db(15) lifecycle[2101592]: HostSeeding:864 BaseImage details : 9.0.0.0.24755229, ESXi, 9.0.0.0.24755229, 2025-06-17 00:00:00.000001
2025-08-17T23:41:03Z Er(11) lifecycle[2101592]: HostSeeding:736 BaseImg Comps are removed: {'VMware-VM-Tools'}
2025-08-17T23:41:03Z Er(11) lifecycle[2101592]: HostSeeding:919 Software info extract errors: The following Components have been removed on the host: VMware-VM-Tools
2025-08-17T23:41:03Z Er(11) lifecycle[2101592]: imagemanagerctl:506 Get Software Info Failed: The following Components have been removed on the host: VMware-VM-Tools
After resolving that I ended up with these errors in /var/log/lifecycle.log on the ESXi host, eluding to VIBs that aren’t in the Reserved VIB Cache Storage which can be found at the /var/vmware/lifecycle/hostSeed/ folder:
2025-08-18T00:09:23Z Db(15) lifecycle[2104496]: HostSeeding:1068 Creating directory /var/vmware/lifecycle/hostSeed
2025-08-18T00:09:23Z Db(15) lifecycle[2104496]: HostSeeding:1102 List of esxio VIB Ids:
2025-08-18T00:09:23Z Db(15) lifecycle[2104496]: Misc:93 {'VMW_bootbank_penedac-esxio_0.1-1vmw.900.0.24755229', 'VMware_bootbank_loadesxio_9.0.0-0.24755229', 'VMware_bootbank_vmware-esx-esxcli-nvme-plugin-esxio_1.4.0.2-1vmw.900.0.24755229', 'VMW_bootbank_vmkusb-esxio_0.1-28vmw.900.0.24755229', 'VMW_bootbank_nmlxbf-gige-esxio_2.3-1vmw.900.0.24755229', 'VMW_bootbank_nmlx5-cc-esxio_4.24.0.7-16vmw.900.0.24755229', 'VMW_bootbank_nvme-pcie-esxio_1.4.0.2-1vmw.900.0.24755229', 'VMware_bootbank_nsx-proto2-libs-esxio_9.0.0.0-9.0.24733064', 'VMW_bootbank_nvmxnet3-esxio_2.0.0.31-16vmw.900.0.24755229', 'VMW_bootbank_nvmetcp-esxio_2.0.0.1-1vmw.900.0.24755229', 'VMW_bootbank_rd1173-esxio_0.1-1vmw.900.0.24755229', 'VMware_bootbank_native-misc-drivers-esxio_9.0.0-0.24755229', 'VMW_bootbank_mnet-esxio_0.1-1vmw.900.0.24755229',
2025-08-18T00:09:23Z Db(15) lifecycle[2104496]: Misc:93 'VMware_bootbank_gc-esxio_9.0.0-0.24755229', 'VMW_bootbank_bfedac-esxio_0.1-1vmw.900.0.24755229', 'VMW_bootbank_spidev-esxio_0.1-1vmw.900.0.24755229', 'VMware_bootbank_esxio-combiner-esxio_9.0.0-0.24755229', 'VMW_bootbank_ionic-en-esxio_24.9.0-11vmw.900.0.24755229', 'VMW_bootbank_nsxpensandoatlas_1.46.0.E.41.2.512-2vmw.900.0.24554284', 'VMW_bootbank_nmlx5-rdma-esxio_4.24.0.7-16vmw.900.0.24755229', 'VMW_bootbank_nmlx5-core-esxio_4.24.0.7-16vmw.900.0.24755229', 'VMware_bootbank_nsx-python-logging-esxio_9.0.0.0-9.0.24733064', 'VMware_bootbank_nsx-esx-datapath-esxio_9.0.0.0-9.0.24733064', 'VMware_bootbank_nsx-python-utils-esxio_9.0.0.0-9.0.24733064', 'VMware_bootbank_esxio-dvfilter-generic-fastpath_9.0.0-0.24755229', 'VMware_bootbank_nsx-context-mux-esxio_9.0.0.0-9.0.24733064',
2025-08-18T00:09:23Z Db(15) lifecycle[2104496]: Misc:93 'VMware_bootbank_nsx-exporter-esxio_9.0.0.0-9.0.24733064', 'VMW_bootbank_nvmxnet3-ens-esxio_2.0.0.23-24vmw.900.0.24755229', 'VMware_bootbank_nsx-shared-libs-esxio_9.0.0.0-9.0.24733064', 'VMware_bootbank_esxio_9.0.0-0.24755229', 'VMware_bootbank_nsx-cfgagent-esxio_9.0.0.0-9.0.24733064', 'VMware_bootbank_nsx-opsagent-esxio_9.0.0.0-9.0.24733064', 'VMW_bootbank_nmlxbf-pmc-esxio_0.1-6vmw.900.0.24755229', 'VMware_bootbank_nsx-python-protobuf-esxio_9.0.0.0-9.0.24499934', 'VMware_bootbank_nsx-proxy-esxio_9.0.0.0-9.0.24733064', 'VMW_bootbank_pengpio-esxio_0.1-1vmw.900.0.24755229', 'VMware_bootbank_nsx-host-esxio_9.0.0.0-9.0.24733064', 'VMware_bootbank_nsx-vdpi-esxio_9.0.0.0-9.0.24733064', 'VMW_bootbank_mlnx-bfbootctl-esxio_0.1-7vmw.900.0.24755229',
2025-08-18T00:09:23Z Db(15) lifecycle[2104496]: Misc:93 'VMware_bootbank_nsx-ids-esxio_9.0.0.0-9.0.24733064', 'VMware_bootbank_nsx-mpa-esxio_9.0.0.0-9.0.24733064', 'VMware_bootbank_nsx-adf-esxio_9.0.0.0-9.0.24733064', 'VMW_bootbank_pensandoatlas_1.46.0.E.41.1.334-2vmw.900.0.24579338', 'VMware_bootbank_vsipfwlib-esxio_9.0.0.0-9.0.24733064', 'VMware_bootbank_nsx-snproxy-esxio_9.0.0.0-9.0.24733064', 'VMW_bootbank_pvscsi-esxio_0.1-7vmw.900.0.24755229', 'VMware_bootbank_nsxcli-esxio_9.0.0.0-9.0.24733064', 'VMW_bootbank_dwi2c-esxio_0.1-7vmw.900.0.24755229', 'VMW_bootbank_penspi-esxio_0.1-1vmw.900.0.24755229', 'VMware_bootbank_nsx-nestdb-esxio_9.0.0.0-9.0.24733064', 'VMware_bootbank_esxio-update_9.0.0-0.24755229', 'VMware_bootbank_nsx-cpp-libs-esxio_9.0.0.0-9.0.24733064', 'VMware_bootbank_esxio-base_9.0.0-0.24755229',
2025-08-18T00:09:23Z Db(15) lifecycle[2104496]: Misc:93 'VMware_bootbank_bmcal-esxio_9.0.0-0.24755229', 'VMware_bootbank_nsx-monitoring-esxio_9.0.0.0-9.0.24733064', 'VMware_bootbank_nsx-platform-client-esxio_9.0.0.0-9.0.24733064', 'VMware_bootbank_nsx-netopa-esxio_9.0.0.0-9.0.24733064', 'VMW_bootbank_vmksdhci-esxio_1.0.3-7vmw.900.0.24755229'}
2025-08-18T00:09:23Z In(14) lifecycle[2104496]: Depot:913 Generating vib: VMware_bootbank_vmware-hbrsrv_9.0.0-0.24755229
2025-08-18T00:09:23Z Db(15) lifecycle[2104496]: HostSeeding:119 Calculated sha256 checksum of payload hbrsrv '9b539e373a3295d3d00cb5ca0d8a1b6310f0ef00e21900d8699338e528f48a28', expected '9b539e373a3295d3d00cb5ca0d8a1b6310f0ef00e21900d8699338e528f48a28'
2025-08-18T00:09:23Z Db(15) lifecycle[2104496]: Vib:3519 Skip truncating since the payload 'hbrsrv' is unsigned.
2025-08-18T00:09:23Z Db(15) lifecycle[2104496]: Vib:3519 Skip truncating since the payload 'hbrsrv' is unsigned.
2025-08-18T00:09:23Z Db(15) lifecycle[2104496]: Vib:3519 Skip truncating since the payload 'hbrsrv' is unsigned.
2025-08-18T00:09:24Z In(14) lifecycle[2104496]: Depot:1186 VIB VMware_bootbank_vmware-hbrsrv_9.0.0-0.24755229 downloaded to /var/vmware/lifecycle/hostSeed/recreateVibs/vib20/vmware-hbrsrv/VMware_bootbank_vmware-hbrsrv_9.0.0-0.24755229.vib
2025-08-18T00:09:24Z In(14) lifecycle[2104496]: Depot:913 Generating vib: VMW_bootbank_penedac-esxio_0.1-1vmw.900.0.24755229
2025-08-18T00:09:24Z Er(11) lifecycle[2104496]: HostSeeding:1136 Extract depot failed: ('VMW_bootbank_penedac-esxio_0.1-1vmw.900.0.24755229', 'Failed to add reserved VIB VMW_bootbank_penedac-esxio_0.1-1vmw.900.0.24755229: not found in the reserved VIB cache storage')
2025-08-18T00:09:24Z Er(11) lifecycle[2104496]: imagemanagerctl:399 Extract depot failed.
2025-08-18T00:09:24Z Er(11) lifecycle[2104496]: imagemanagerctl:122 [ReservedVibExtractError]
2025-08-18T00:09:24Z Er(11)[+] lifecycle[2104496]: ('VMW_bootbank_penedac-esxio_0.1-1vmw.900.0.24755229', 'Failed to add reserved VIB VMW_bootbank_penedac-esxio_0.1-1vmw.900.0.24755229: not found in the reserved VIB cache storage')
2025-08-18T00:09:24Z Er(11) lifecycle[2104496]: imagemanagerctl:127 Traceback (most recent call last):
2025-08-18T00:09:24Z Er(11) lifecycle[2104496]: imagemanagerctl:127   File "/lib64/python3.11/site-packages/vmware/esximage/Depot.py", line 931, in GenerateVib
2025-08-18T00:09:24Z Er(11) lifecycle[2104496]: imagemanagerctl:127     resVibPath = resVibCache.getVibLocation(vibobj.id)
2025-08-18T00:09:24Z Er(11) lifecycle[2104496]: imagemanagerctl:127   File "/lib64/python3.11/site-packages/vmware/esximage/ImageManager/HostSeeding.py", line 1271, in getVibLocation
2025-08-18T00:09:24Z Er(11) lifecycle[2104496]: imagemanagerctl:127     raise VibNotInCacheError('VIB %s is not available in cached locations'
2025-08-18T00:09:24Z Er(11) lifecycle[2104496]: imagemanagerctl:127 esximage.ImageManager.HostSeeding.VibNotInCacheError: VIB VMW_bootbank_penedac-esxio_0.1-1vmw.900.0.24755229 is not available in cached locations
2025-08-18T00:09:24Z Er(11) lifecycle[2104496]: imagemanagerctl:127
2025-08-18T00:09:24Z Er(11) lifecycle[2104496]: imagemanagerctl:127 During handling of the above exception, another exception occurred:
2025-08-18T00:09:24Z Er(11) lifecycle[2104496]: imagemanagerctl:127
2025-08-18T00:09:24Z Er(11) lifecycle[2104496]: imagemanagerctl:127 Traceback (most recent call last):
2025-08-18T00:09:24Z Er(11) lifecycle[2104496]: imagemanagerctl:127   File "/usr/lib/vmware/lifecycle/bin/imagemanagerctl.py", line 397, in depots
2025-08-18T00:09:24Z Er(11) lifecycle[2104496]: imagemanagerctl:127     HostSeeding.InstalledImageInfo().extractDepot(task)
2025-08-18T00:09:24Z Er(11) lifecycle[2104496]: imagemanagerctl:127   File "/lib64/python3.11/site-packages/vmware/esximage/ImageManager/HostSeeding.py", line 1120, in extractDepot
2025-08-18T00:09:24Z Er(11) lifecycle[2104496]: imagemanagerctl:127     Depot.DepotFromImageProfile(newProfile, depotDir,
2025-08-18T00:09:24Z Er(11) lifecycle[2104496]: imagemanagerctl:127   File "/lib64/python3.11/site-packages/vmware/esximage/Depot.py", line 1341, in DepotFromImageProfile
2025-08-18T00:09:24Z Er(11) lifecycle[2104496]: imagemanagerctl:127     return DepotFromImageProfiles(imgprofiles, depotdir, vibdownloadfn, vendor,
2025-08-18T00:09:24Z Er(11) lifecycle[2104496]: imagemanagerctl:127   File "/lib64/python3.11/site-packages/vmware/esximage/Depot.py", line 1184, in DepotFromImageProfiles
2025-08-18T00:09:24Z Er(11) lifecycle[2104496]: imagemanagerctl:127     vibdownloadfn(localfn, allRelatedVibs[vibid],
2025-08-18T00:09:24Z Er(11) lifecycle[2104496]: imagemanagerctl:127   File "/lib64/python3.11/site-packages/vmware/esximage/Depot.py", line 934, in GenerateVib
2025-08-18T00:09:24Z Er(11) lifecycle[2104496]: imagemanagerctl:127     raise Errors.ReservedVibExtractError(vibobj.id,
2025-08-18T00:09:24Z Er(11) lifecycle[2104496]: imagemanagerctl:127 esximage.Errors.ReservedVibExtractError: ('VMW_bootbank_penedac-esxio_0.1-1vmw.900.0.24755229', 'Failed to add reserved VIB VMW_bootbank_penedac-esxio_0.1-1vmw.900.0.24755229: not found in the reserved VIB cache storage')
Additional evidence from vCenter Recent Tasks pane:
This happened through trial and error, I then figured I needed to split the io VIBs to the correct directories in the Reserved VIB Cache Storage. Errors started to resolve until…
And now I made sure that the tools-light was the correct version in the Reserved VIB Cache Storage, the Offline Depot (VMware-ESXi-9.0.0.0100.24813472-depot.zip) had an outdated version.
Okay, it never ends… I’m trying to get this going before I run out of day light… On the bright side I get enough time inside of vCenter before the deployment Workflow kills the VM to get a glimpse of the error from the Recent Tasks pane.
If you want to host the VCF Offline Depot on your QNAP NAS, this walkthrough gets you up and running fast. Hosting the depot locally saves space, bandwidth, and even cuts down the number of helper VMs you’d otherwise keep around.
Control Panel → Applications → Web Server → Enable Web Server. (HTTP is fine here; I’ll show the VCF Installer tweak for HTTP a bit later.)
Step 2) Move the files to your Web Root
By default, QNAP serves from the Web share. In my case that’s:
/share/ZFS24_DATA/Web/
You can use the default Web share or create a Virtual Host if you want a dedicated hostname/port. The important part is that your document root actually contains the VCF depot layout.
This is the exact folder structure that worked for me:
I had to move the vsan folder and metadata folder into the PROD folder to sit alongside the COMP folder, both of those originally downloaded into COMP automatically.
Step 3) Add basic authentication
Create your .htaccess and .htpasswd files, here’s the content of my .htaccess:
# at /share/ZFS24_DATA/Web/.htaccess (you will need to change your path so it matches what your ZFS path is
Options +Indexes
IndexOptions FancyIndexing NameWidth=*

AuthType Basic
AuthName "Restricted Area"
AuthUserFile /share/ZFS24_DATA/Web/.htpasswd

# Let Java/okhttp clients (VCF) through without a password
SetEnvIfNoCase User-Agent "Java|okhttp" vcf_ok=1

<IfModule mod_authz_core.c>        # Apache 2.4
  <RequireAny>
    Require env vcf_ok
    Require valid-user
  </RequireAny>
</IfModule>
<IfModule !mod_authz_core.c>       # Apache 2.2 fallback
  Order allow,deny
  Allow from env=vcf_ok
  Satisfy any
  Require valid-user
</IfModule>

# Don’t leak .ht* files
<FilesMatch "^\.ht">
  Require all denied
</FilesMatch>

# Make sure JSON is sent with correct type
AddType application/json .json
I then ran these commands to create my .htpsswd file on the QNAP NAS via PuTTy:
htpsswd is not a command that is found in bash on the QNAP NAS, instead you can leverage openssl to hash your password:
Restart the QNAP web server:
/etc/init.d/Qthttpd.sh restart
Step 4) Allow HTTP for the Offline Depot on the VCF Installer Appliance
By default the VCF Installer is looking to use HTTPS when connecting to the Offline Depot. For the purposes of a lab, this is overkill. The command below will allow you to connect to an Offline Depot with HTTP.
While the VCF user is allowed to connect via SSH, it doesn’t have privileges to edit the file that we need to make the change on. The default setting for root is that it’s not allowed to login via SSH on the VCF Installer Appliance, you can change this if you want. I found it quicker to do what you need via the console where root is allowed to login:
Click Download to pre-stage the content you need (select all of the files first).
Step 7) Wait for the files to Load…
Outtro (the witty bit)
Congratulations, you just turned a humble QNAP into a mini-CDN for SDDC Manager. Fewer VMs, fewer downloads from the internet, and CPU cycles easing into a smooth landing, leaving more runway for your lab workloads instead. If only every homelab project was this satisfying: copy some files, charm Apache with a .htaccess, flip one tiny flag in the VCF Installer, and boom. VCF now eats from your own buffet. Bon appétit, SDDC. Now you can deploy VCF 9.0 with your own Offline Depot.🍴🚀
If you’re eyeing the VMware Certified Professional, VMware Cloud Foundation (VCF) 2V0-13.24 exam, you’re already walking the path of shaping modern private cloud architecture. Whether you’re a seasoned architect or an admin stretching into design territory, this guide will help you focus your prep with intention. For me, this wasn’t just another VCP… this was Credly Badge #99, and it didn’t come without deliberate study and real-world experience.
📘 About the Exam
The 2V0-13.24 is not your typical “click next” kind of test. This is a design-level VCP focused on VMware Cloud Foundation 5.x. You’re not just expected to know the how, but the why behind each architectural decision.
The exam is structured to evaluate whether you can:
Interpret business and technical requirements
Translate those into logical and conceptual designs
Make design decisions aligned with Availability, Manageability, Performance, Recoverability, and Security (AMP-RS)
Map design choices directly to business outcomes
🧠 Core Topics You Must Master
Here’s a breakdown of the exam blueprint themes and what you need to nail:
1. Logical vs Conceptual Design
Understanding the distinction here is key:
Conceptual Design = “What does the business want to achieve?”
No technology mentioned.
Focus on high-level goals and constraints.
Logical Design = “How do we architect it logically?”
Technologies emerge, but no IPs, VLANs, or hosts yet.
The exam guide is structured around real-world architectural flows – from stakeholder interviews to final documentation. Don’t just skim it – match each objective to something you’ve done in a VCF environment.
✅ 2. Use the VMware Cloud Foundation Reference Architecture (VCF RA)
It’s not just documentation – it’s the answer key to many design scenarios. Learn the validated designs and the reasoning behind them.
✅ 3. Connect Requirements to Design
Practice translating a list of stakeholder needs into design decisions:
Example: “Developers want isolation and scalability” → Is this a separate WLD? Do you use vRA Projects for guardrails?
This is where working with VCF daily becomes an advantage. Lab what you can, especially around:
SDDC Manager workflows
Creating and deleting WLDs
Integrating Aria and NSX
🏁 Final Thoughts
This exam rewards those who understand why each decision matters. It’s not a test of memorization, it’s a test of your architectural mindset. If you’re working in VCF environments, or guiding customers through design workshops and decisions, this certification is your validation.
After a month of research, weighing hardware options, and diving deep into reviews, I finally made the decision to build my new home lab setup. As a VMware enthusiast, I wanted something that was compact but powerful enough to handle everything in VCF, all while fitting neatly into my workspace. That’s when I landed on the ASUS NUC 15 Pro+ with the Intel Core Ultra 9 285H processor-the perfect little powerhouse!
🧠 The Heart of the Build: ASUS NUC 15 Pro+ with Intel Core Ultra 9 285H
This isn’t your typical NUC. While the specs officially list support for 96GB of DDR5 RAM (SODIMM), I was pleasantly surprised to find that it actually supports 128GB-just what I needed. I picked up the Crucial 128GB Kit (2x64GB) DDR5 RAM, 5600MHz, which is more than enough to power my ESXi setup and handle multiple virtual machines simultaneously. It’s fast, responsive, and easily handles the demands of a small private cloud setup at home.
Everything can be installed completely tool-less and it can be mounted to any surface. During initial testing, it generated very little heat and was very responsive.
💾 Dual NVMe Setup: Unmatched Speed and Capacity
When it comes to storage, I wasn’t willing to compromise on speed. I opted for the Corsair MP600 Micro 2TB NVMe PCIe x4 drive in the 2242 slot as my primary storage. The performance is stunning, and with PCIe 4.0 support, it’s more than enough to handle everything I throw at it.
But I didn’t stop there-who can resist the urge for more speed and storage, right? In the 2280 slot, I installed a Samsung SSD 9100 PRO 1TB. This is where the fun begins: I’m using it for NVMe Memory Tiering in ESXi and to carve out some capacity for VMFS. Together, these two NVMe drives offer the perfect balance of performance and storage capacity, handling everything from VM storage to memory-intensive tasks-keeping everything in my virtual environment running smoothly.
🌐 Networking: Thunderbolt 4 Speed for Seamless Performance
I didn’t neglect networking either. To ensure I get maximum throughput, I added the OWC Thunderbolt 4 10G Ethernet Adapter. Fast networking is a must in any lab, and this adapter lets me transfer large files, run multi-node clusters, and test configurations without hitting any bottlenecks. With Thunderbolt 4 connectivity, I can rest assured that network speed will never be a limiting factor in my home lab.
I decided to give the OWC TB4 version a try myself. Unfortunately the OWC TB4 version wasn't compatible with the ESXi USB NIC Driver Fling. I ended up swapping it out for the TB3 version.
🔧 Why This Build?
Why the ASUS NUC 15 Pro+ and these specific components? Simple: I wanted a setup that was compact yet powerful, with potential to expand to a 2-node or 3-node. The Intel Core Ultra 9 285H CPU gives me all the processing power I need, while the dual NVMe storage ensures I’ll never run out of fast, responsive space. The Thunderbolt 4 adapter takes care of any networking requirements, ensuring smooth operations even with heavy workloads.
It’s the perfect mix of size and performance for getting started.
Looking back, I realized that the ASUS NUC 15 Pro+ with the 285H doesn’t have enough cores to support VCF Auto, which means I can’t fully unlock the potential I was hoping for from the ASUS unless I run a 2nd box with different hardware.
🧪 Final Thoughts: Lab Ready, Future-Proof, and Compact
This lab is built to last. Whether I’m testing VMware Cloud Foundation (VCF), experimenting with ESXi features, or just refining my skills, this setup is ready for it all-well, except for VCF Auto, but that’s a topic for another day. The ability to leverage NVMe Memory Tiering to increase the amount of Memory for additional workloads is a game-changer, and the enhanced speed and connectivity make this NUC the center of my lab.
I’m eager to see how this setup performs over time, and I’ve already started rolling out VCF. Stay tuned for more updates as I continue optimizing and tweaking this lab.
For anyone thinking about building their own home lab, I highly recommend the ASUS NUC 15 Pro+ setup. It’s compact, powerful, and the perfect platform to elevate your VCF knowledge to the next level.
You’re sipping your morning cold brew, dreaming of a WordPress site served fresh from Kubernetes. “Click-to-Deploy,” you say smugly. “How hard could it be?”
Fast forward 2 hours later – you’re SSH’d into a container, your site is displaying the WordPress default, and your beautiful backend is wide open like it’s 2007.
Welcome to the real journey of deploying WordPress on GKE with security and sanity in mind. Buckle up.
🚀 Step 1: Click-to-Deploy – It Actually Works (Sorta)
Google Cloud’s Click-to-Deploy makes it deceptively simple to launch a WordPress site on GKE. You choose your region, your cluster, and Google sets up:
A GKE deployment with pods running WordPress and MariaDB
A LoadBalancer service for external access
Persistent Disks for data durability
An Ingress controller for routing
A managed SSL certificate for your domain (automatic renewal FTW 🙌)
But that’s where the real work starts.
🔐 Step 2: Locking Down /wp-admin Like It’s Area 51
By default, /wp-admin is public-facing. This is fine if you enjoy brute force attempts from random IPs in places you can’t pronounce.
Here’s how I fixed that using Cloud Armor:
# cloud-armor-policy.yaml
- action: "deny(403)"
  description: "Block access to /wp-admin from non-approved IPs"
  match:
    expr:
      expression: 'request.path.startsWith("/wp-admin") && ip != "YOUR_IP"'
🔧 This policy was applied to the backend service behind the Ingress. Now only my IP gets in. Everyone else? 👋 Denied.
And if you’re wondering why it wasn’t working the first time? Google Cloud Armor policies must be explicitly attached to the backend service and precedence matters.
🛡️ Step 3: Multi-Factor Like a Boss – DUO MFA Plugin
I wasn’t about to trust my WordPress login to a simple password, so I added DUO Security using their official WordPress plugin.
Steps:
Created a new application in the DUO admin panel.
Installed the DUO WordPress plugin via wp-admin.
Configured the plugin with my DUO integration key, secret key, and API hostname.
👨💻 This plugin integrates natively with WordPress login, prompting for second-factor auth directly. It works beautifully and adds minimal delay.
Bonus: It doesn’t interfere with wp-cli or other automation – unless you want it to.
🧪 Step 4: Debugging – The Unexpected “Default” WordPress Reset
At one point, I thought my GKE cluster had lost its mind. My site reverted to default – vanilla WordPress, theme and all. Turns out…
Cause:
GKE’s rolling updates during auto-upgrade recycled the pods, but PVC mounts weren’t persistent in the way I assumed. Classic.
Fix:
I moved my important data to a separate PersistentVolumeClaim, mounted explicitly via volumeMounts in the deployment manifest:
Store MariaDB externally – GKE restarts can get dicey. Cloud SQL or AlloyDB might save you from a panic attack.
Add readinessProbes to your pods – it avoids weird 502s during rolling updates.
Get serious with backups – automate snapshots and export your database regularly.
Use a staging environment – Kubernetes is predictable… until it isn’t.
🎤 Final Thoughts
Running WordPress on GKE is a flex, but like any good lab project, it’ll humble you. When done right, though? You get a secure, auto-scaling, SSL-enabled, MFA-protected WordPress site – with the full power of Kubernetes at your fingertips.
A Practical Guide to Passing the VCF Admin Exam (2V0-11.25)
If you’re here reading this, chances are you’re considering or preparing to take the VMware Cloud Foundation (VCF) Admin exam (2V0-11.25), based on VCF 5.2. Let’s take a more straightforward and practical approach, focusing on what you need to know to pass this exam and some solid recommendations for your preparation.
1. Understand the Exam Topics
The exam covers a wide range of topics, so it’s crucial to familiarize yourself with the exam blueprint, which is the official guide outlining the domains and objectives. Here’s a quick rundown of what you’ll need to study:
Architecture and Components of VMware Cloud Foundation Understand the overall architecture of VCF, including how vSphere, vSAN, and NSX work together. You should know how VCF integrates with vSphere, NSX, and vSAN, and how the SDDC Manager orchestrates everything.
Deployment and Configuration This section tests your ability to deploy and configure VCF components. You’ll need to know how to set up the environment, configure networking and storage, and perform lifecycle management tasks like patching and upgrading.
Management and Monitoring You’ll be asked questions about managing the VCF environment and monitoring its health. Familiarize yourself with the SDDC Manager interface, how to use vCenter for monitoring, and how to troubleshoot issues within the VCF environment.
Troubleshooting and Maintenance Troubleshooting is a key skill. Be prepared to identify common issues with VCF, understand how to use logs to diagnose problems, and know how to perform basic maintenance tasks.
2. Set Up a Hands-On Lab
One of the best ways to prepare for this exam is through practical experience. If you haven’t already, set up a lab environment where you can deploy and configure VCF. Even if you don’t have access to an actual VCF environment, VMware provides resources like VMware Hands-on Labs, which offer free, guided lab environments that mimic the real-world setup.
Recommendation:
Use VMware Cloud Foundation Documentation to get familiar with deployment steps and configuration tasks.
Practice basic tasks such as deploying a VCF instance, configuring networking, and managing vCenter through the SDDC Manager.
3. Focus on the Key Tools and Technologies
The VCF Admin exam tests your knowledge of several VMware tools and technologies. Make sure you’re comfortable with the following:
vSphere Familiarize yourself with the deployment and configuration of vSphere environments, particularly how it integrates with VCF.
vSAN Review vSAN concepts, including how to configure storage and manage clusters within the VCF framework.
NSX-T Know how to deploy and configure NSX-T in a VCF environment. Be prepared to understand networking and security policies, as well as how to configure and troubleshoot them within VCF.
SDDC Manager This is the heart of VCF management. Be comfortable navigating and using the SDDC Manager to manage the lifecycle of VCF components, perform updates, and configure settings.
4. Study the Exam Guide and Resources
VMware provides a comprehensive exam guide for 2V0-11.25, which is the foundation of your study plan. Here are some other useful resources to consider:
VMware VCF 5.2 Documentation This is your most important resource for understanding how VCF works in practice. Make sure to review installation guides, troubleshooting procedures, and lifecycle management best practices.
Training and Courses VMware offers several official training courses for VCF, such as the “VMware Cloud Foundation: Deploy and Manage” course. If you haven’t already taken it, I highly recommend it. It provides valuable hands-on experience and prepares you for real-world scenarios.
Practice Exams If available, practice exams are an invaluable resource for familiarizing yourself with the question format and ensuring you’re on track.
5. Time Management During the Exam
The VCF Admin exam is 60 minutes long, and you’ll have around 70 questions. It’s important to manage your time carefully. Here are a few tips:
Don’t dwell too long on any one question. If you’re stuck, mark it and come back to it later. Focus on answering the questions you’re sure about first.
Understand the question format. Many questions require you to identify the best solution for a given scenario. Focus on understanding the broader context of each question before jumping to the answer.
Use the exam to validate your knowledge. It’s okay to not know every single detail. Trust in your preparation and don’t second-guess yourself too much.
6. Conclusion
The VCF Admin exam (2V0-11.25) is challenging but entirely manageable with the right preparation. By familiarizing yourself with the core concepts of VCF 5.2, gaining hands-on experience, and studying the exam guide, you’ll be well-prepared to succeed.
Remember, it’s not about memorizing every detail-it’s about understanding the foundational concepts of VMware Cloud Foundation and how they fit together. So, take a deep breath, focus on the key areas, and give yourself the time you need to study effectively.
Good luck, and here’s to earning that VCF Admin certification!